
The New Custom Element dialog allows an administrator to create either a new Local or Global custom element.
From the left panel of the Site Administration Dashboard, click Elements under the Elements & Forms section. This will invoke the Manage Elements dialog. On the bottom toolbar, click the 'Add New Element' link. This will invoke the 'New Custom Element' dialog.
(Local Custom Element type chosen)
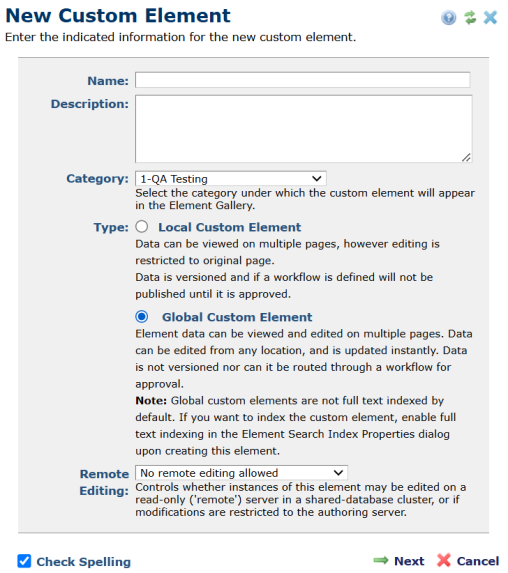
(Global Custom Element type chosen)
Use this dialog to set or change the following options:
Name - Required. Sets or displays the Custom Element name. Enter a unique name to identify this custom element.
Description - Optional. Sets or displays the description that appears in the Manage Elements and Element Gallery dialogs for this custom element.
Category - Required. Sets or displays the Element Gallery category for this Element from the alphabetical dropdown of available category types. If a default category is defined in Manage Element Categories, displays the default category first.
Type - Required. Sets or displays whether the Custom Element is Local or Global.
The difference between a 'Local' custom element and a 'Global' custom element is that a 'Local' custom element is associated with a page, and must be editted on that page. A 'Global' custom element, is not associated with a page anc can be editted anywhere global custom elements can be editted (in Site Administrator or from an instance of the global custom element). Both 'Global' and 'Local' custom elements support content reuse, meaning their data can be displayed anywhere on the site either dynamically through a filter or through manual selection.
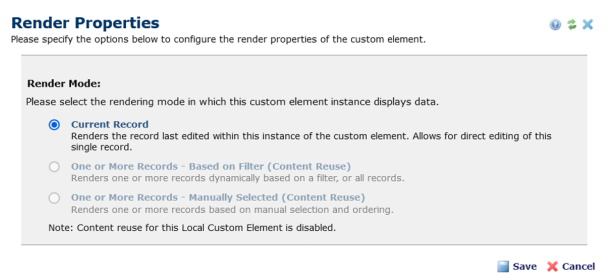
For 'Local' custom elements, you can disable content reuse, by unchecking the 'Enabled Content Reuse' checkbox. if disabled, contributors will not be able to select either of teh two reuse options in the Render Properties dialog. The two options will be disabled.
Note: You cannot change Element Type once an Element is created. It is important to determine Custom Element type up-front.
Remote Editing - Optional. Enables or disables editing of instances of the Global Custom Element on a Read-Only Production server (either through a Datasheet Element's Edit Form or the RenderSimpleForm API call). Once enabled, editing an instance of a Global Custom Element on a Read-Only Production Server clears the associated cache and updates instances of that Element on the Authoring server or other Read-Only Production Servers, when the Element is rendered again.
Note: This option is available only for sites licensed for one or more Shared Database Read-Only Production Servers and only if Element Type is Global.
For Global Custom Elements containing fields that upload physical files (images, for example), you can only use this option under a shared file system, since there are no provisions for synchronizing physical files associated with an instance of a Custom Element across multiple servers.
Check Spelling - When checked, runs spellcheck on the Element Description field, and displays the Spellcheck dialog with standard correction options. Unchecked, does not check for spelling errors. See Spell Check Settings for more about setting default behavior for this option.
During Element creation click Next to display the Custom Element Field Definitions dialog or Cancel to exit.
Related Links
You can download PDF versions of the Content Contributor's, Administrator's, and Elements Reference documents from the support section of paperthin.com (requires login).
For technical support:
